May 3, 2026
That brown ceiling stain rarely stays just a stain for long. In Southwest Florida, a ceiling can go from slightly discolored to sagging, soft, and mold-prone fast, especially after a roof leak, AC issue, burst pipe, or storm-driven moisture. Water damaged ceiling repair is not just about patching drywall. It starts with finding the source, stopping ongoing damage, and making sure the structure above the ceiling is safe and dry before anything gets covered back up.
When people wait, the repair usually gets bigger and more expensive. Paint bubbles, tape seams separate, insulation gets soaked, and trapped moisture starts feeding mold. If the ceiling is actively dripping, bowing, or feels soft to the touch, treat it like an urgent property damage issue, not a cosmetic one.
What causes a water damaged ceiling?
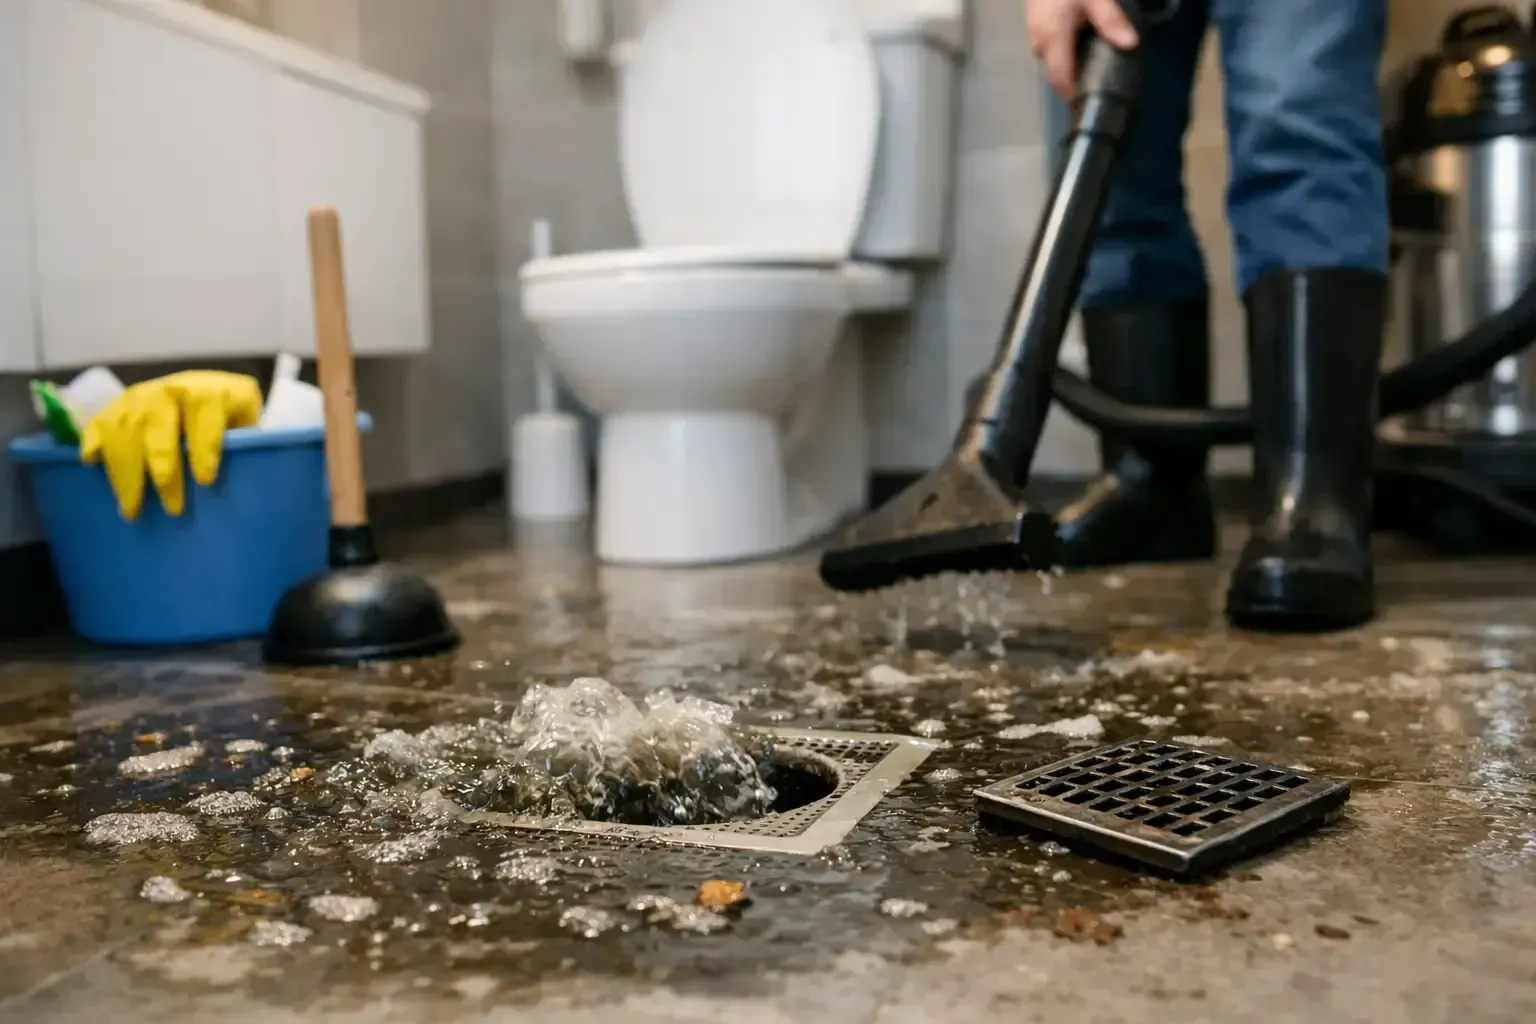
Most ceiling damage starts above the visible spot. A roof leak is an obvious culprit, but in Florida homes, failed plumbing lines, overflowing tubs, appliance leaks, and air handler or AC drain line problems are just as common. Sometimes the water traveled several feet before showing itself, which is why the stain you see is not always directly below the source.
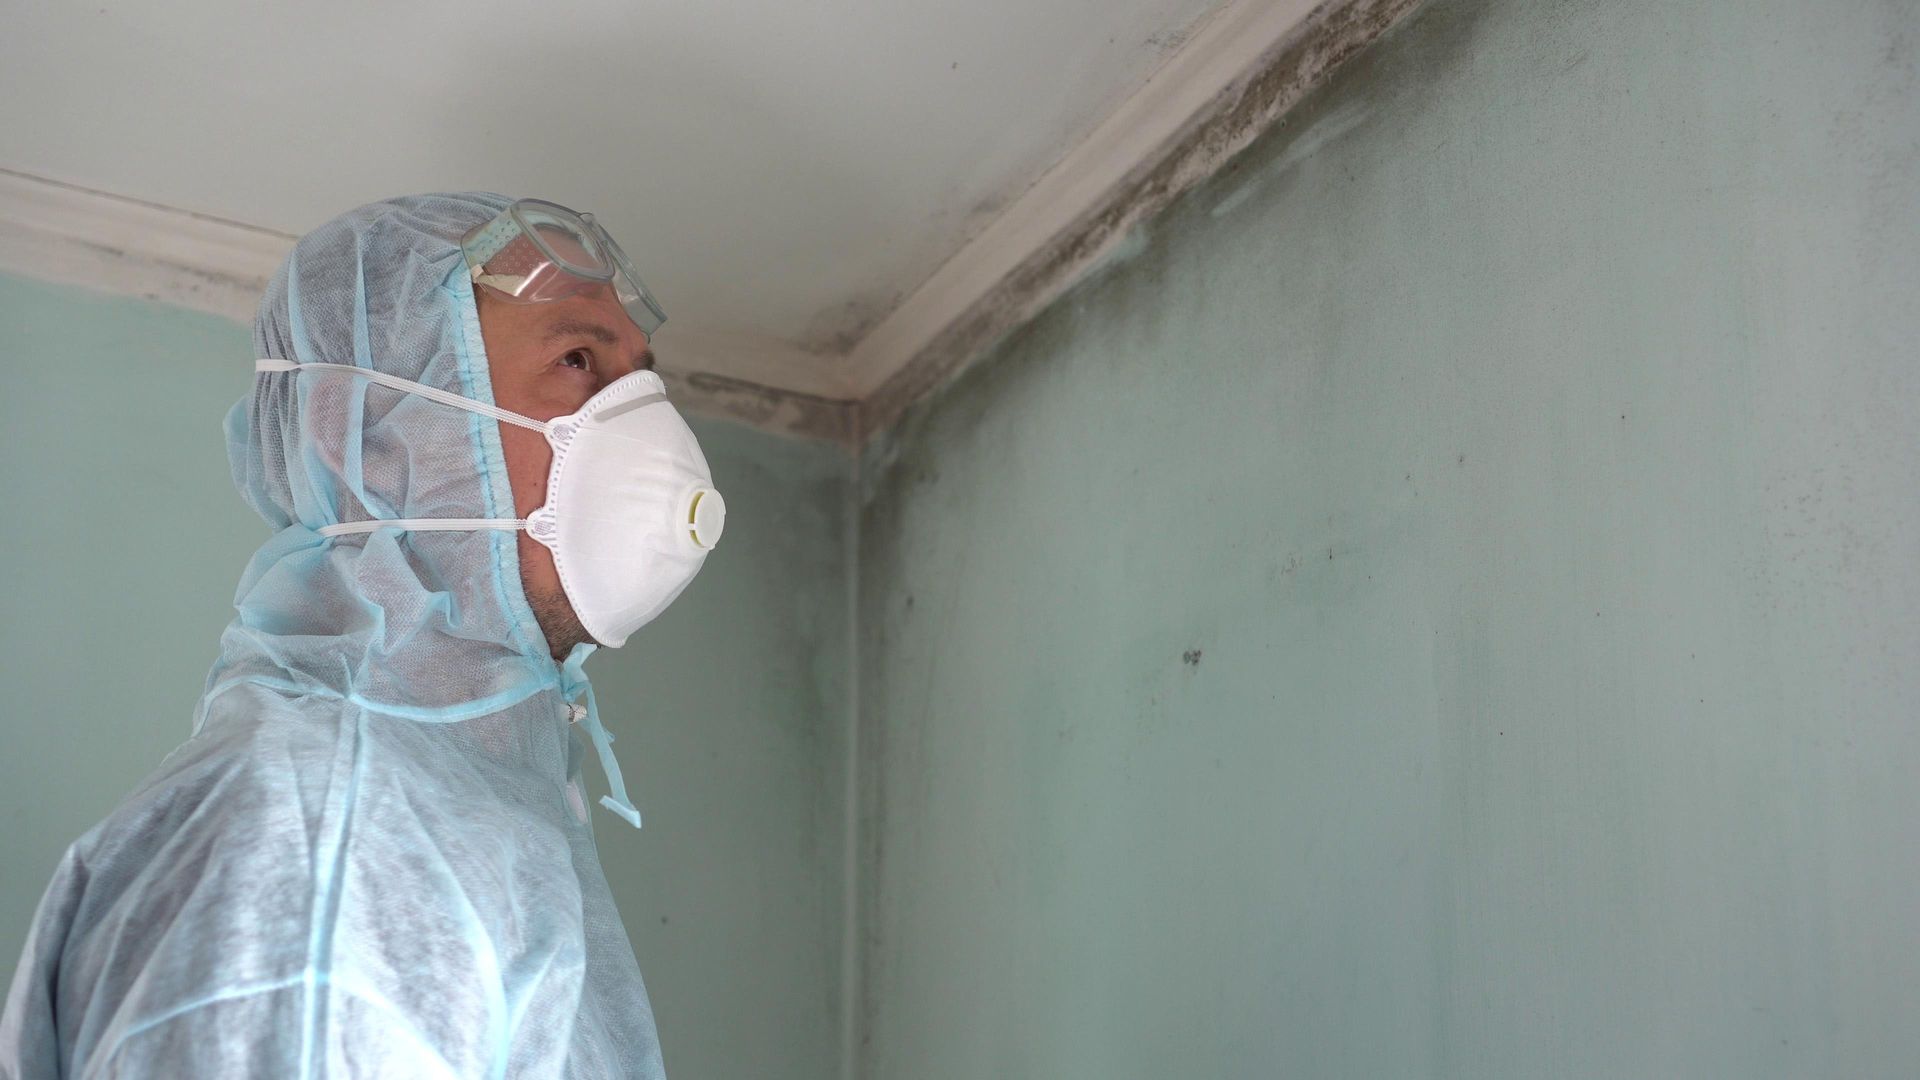
Humidity can complicate the picture too. In some homes, poor ventilation in attics or hidden condensation around HVAC components adds moisture slowly over time. That kind of damage may look minor at first, but it often leads to soft drywall, staining, and mold growth around the edges of the affected area.
The cause matters because the repair plan changes depending on what got wet. Clean water from a supply line is one thing. Gray water from an appliance backup is different. Sewage-contaminated water requires a much more controlled cleanup and cannot be handled like a standard drywall patch.
When ceiling water damage becomes an emergency
Not every ceiling stain means immediate collapse, but some signs should push the situation into emergency mode. If the ceiling is sagging, cracking in a circle, dripping steadily, or bulging downward, there may be pooled water above it. That weight can bring down drywall unexpectedly.
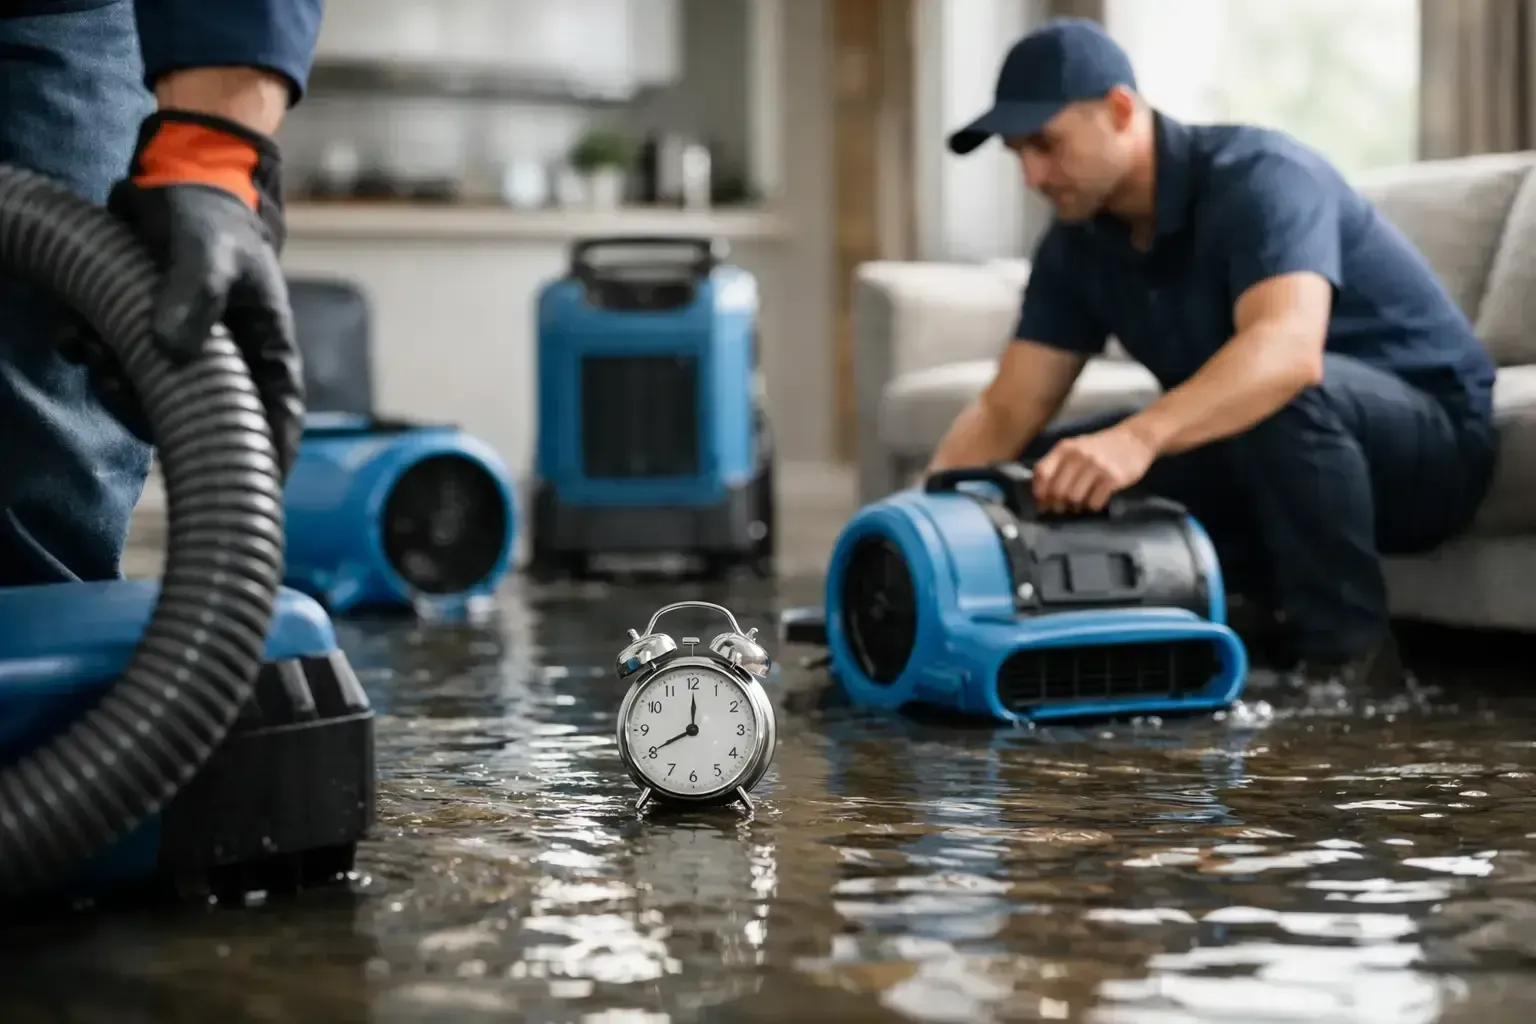
Turn off electricity to affected areas if water is near light fixtures, fans, or recessed lighting and it is safe to access the breaker. Move furniture and valuables out from under the damage. Then call a restoration professional who can inspect the source, remove trapped water, and start structural drying.
This is where fast response matters. The longer moisture sits inside the ceiling cavity, the more likely you are to deal with damaged framing, wet insulation, microbial growth, and a larger reconstruction bill. For homeowners already juggling insurance questions and household disruption, speed is not a luxury. It is damage control.
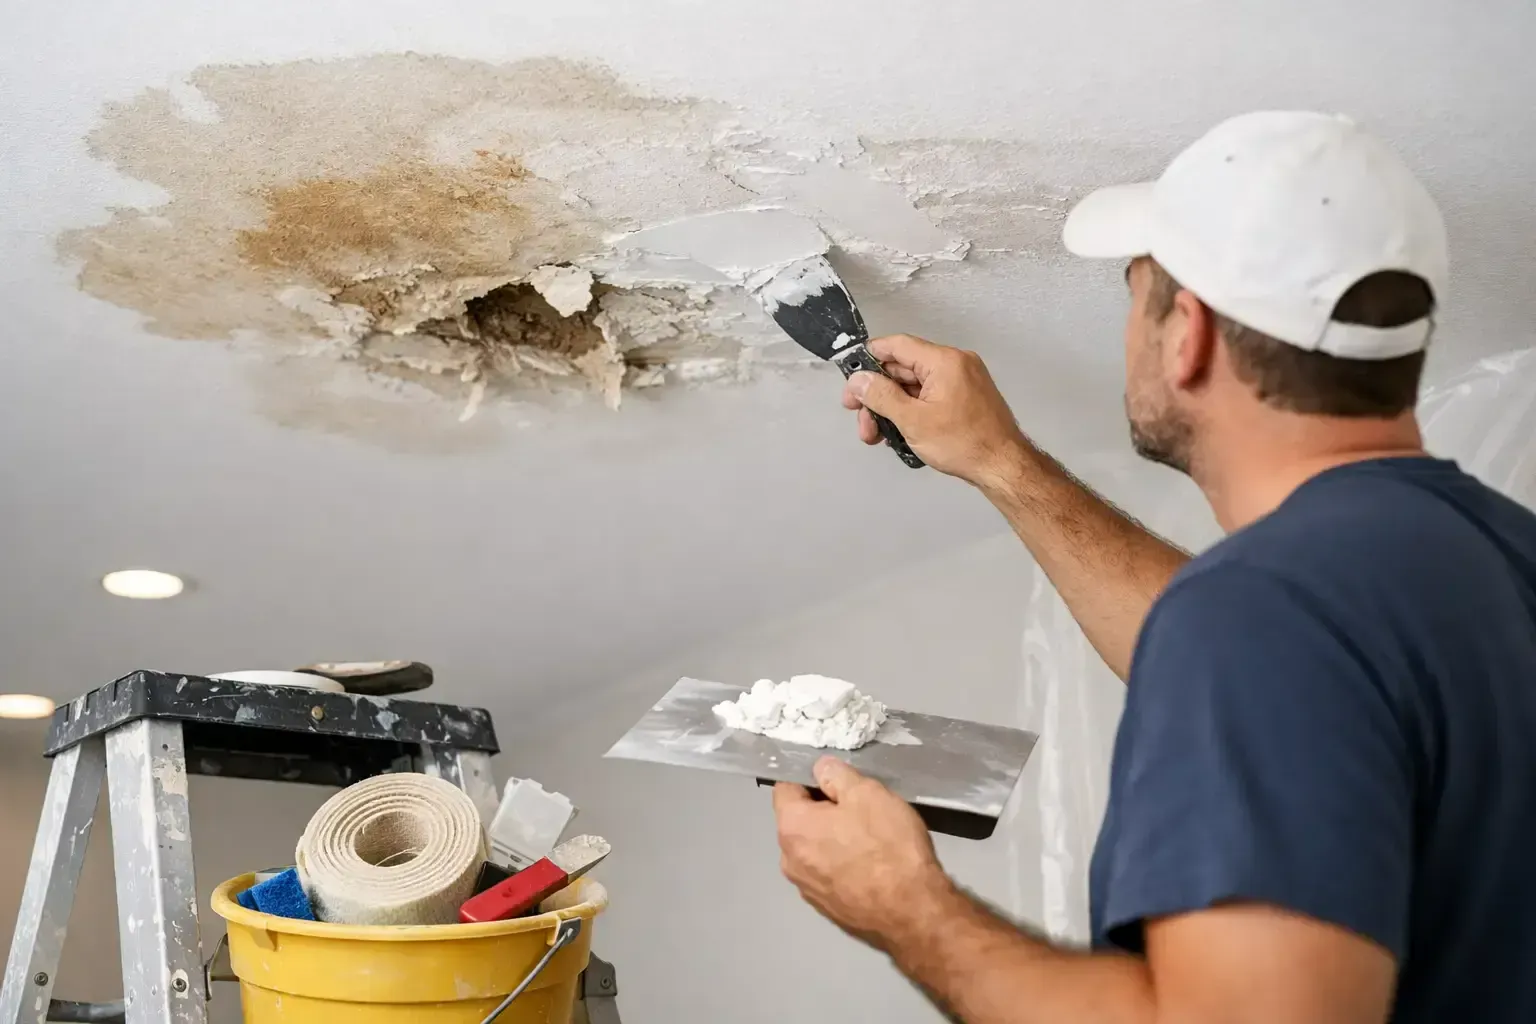
Water damaged ceiling repair starts before the patch
A lot of people think ceiling repair means cutting out a bad section and repainting. That only works if the area is fully dry and the leak has been permanently stopped. Otherwise the stain comes back, the patch fails, or mold starts growing behind the new surface.
A proper water damaged ceiling repair usually begins with mitigation, not rebuilding. First, the source of the water must be identified and stopped. After that, technicians assess how far the moisture spread into drywall, insulation, joists, and nearby wall cavities. Moisture readings help determine what can be saved and what needs to be removed.
In minor cases, drying may be enough if the ceiling material is still structurally sound and the water exposure was brief. In many real-world situations, though, at least part of the drywall has to come down. Wet drywall loses strength quickly, and once it sags or crumbles, replacement is usually the safer option.
The typical repair process
The first step is containment and protection of the surrounding area. Floors, furniture, and unaffected rooms may need to be covered or isolated so demolition dust and moisture do not spread. If there is standing water trapped in a ceiling bubble, professionals may release it in a controlled way instead of waiting for the entire section to fail.
Next comes removal of unsalvageable material. That can include ceiling drywall, wet insulation, damaged texture, and sometimes sections of framing trim if they have been heavily affected. This stage is also where hidden mold is often discovered. If microbial growth is present, remediation needs to happen before reconstruction begins.
After demolition, the space needs to dry thoroughly. Air movers, dehumidifiers, and moisture monitoring are used to bring materials back to an acceptable dry standard. This part is easy to underestimate because the surface may feel dry before the cavity above it is actually ready.
Once everything is clean and dry, reconstruction begins. New drywall is installed, seams are taped and finished, texture is matched as closely as possible, and the area is sealed and painted. Depending on the size of the damage, this may be a one-room repair or part of a larger restoration project involving walls, flooring, or cabinetry below.
Can you repair it yourself?
It depends on the damage, the water source, and how confident you are that the leak is resolved. A very small stain from a one-time issue may only need stain-blocking primer and paint after the area has been confirmed dry. But once drywall is soft, sagging, crumbling, or contaminated, a simple DIY fix is usually not enough.
The risk with do-it-yourself ceiling work is not just appearance. It is missing hidden moisture, trapping mold inside the cavity, or working under unstable drywall. If insulation above the ceiling is wet, if the leak source is still unclear, or if electrical fixtures are involved, professional help is the safer call.
Many homeowners also underestimate how difficult overhead drywall and texture matching can be. Even if the patch holds, a poor finish often leaves the repair visible from every angle. In an emergency, the bigger issue is making sure the home is truly dry and safe before the cosmetic work starts.
Insurance and ceiling water damage
Insurance coverage depends on the source of the water and the details of your policy. Sudden and accidental losses, like a burst pipe or overflow event, are often treated differently than long-term leaks or neglected maintenance issues. That distinction matters when you are deciding how quickly to document damage and report the loss.
Take photos as soon as you can do so safely. Keep records of where the water came from, when you noticed it, and what emergency steps were taken. If you have active leaking, standing water, or a collapse risk, mitigation should not be delayed while you wait for an adjuster. Preventing further damage is part of protecting the claim.
This is one reason many homeowners prefer working with a restoration company that understands insurance documentation and can coordinate the process. In a stressful situation, having a team handle moisture readings, photos, scope details, and emergency response can reduce a lot of back-and-forth.
How to prevent repeat ceiling damage
The best prevention is routine attention to the systems above your ceiling. Roof inspections matter, especially after storms. HVAC drain lines should be checked and cleared. Plumbing leaks around bathrooms, laundry rooms, and water heaters should never be ignored just because they seem small.
Watch for warning signs that show up before a full ceiling failure. Peeling paint, faint rings, musty odor, nail pops, and slight texture changes can all point to hidden moisture. In Florida homes, where heat and humidity speed up secondary damage, early action often means a smaller repair and less chance of mold.
If you notice a new ceiling stain after heavy rain or your AC has been struggling, it is worth getting it inspected right away. Waiting a week to see if it dries on its own can turn a limited fix into a larger restoration job.
Choosing help for water damaged ceiling repair
Not every contractor handles emergency moisture damage the same way. Ceiling repair after a water event should involve more than drywall replacement. You want the source identified, wet materials properly removed, the structure dried and monitored, and any mold concerns addressed before the rebuild is finished.
A local restoration company with 24/7 response can make a real difference when damage is actively spreading. In Southwest Florida, where storms, humidity, and sudden leaks can escalate quickly, rapid dispatch is often what keeps a ceiling problem from becoming a whole-house problem. If the damage is urgent, companies like FloStop Restoration LLC are built for that kind of response, including emergency mitigation and insurance-friendly documentation.
If your ceiling is stained, sagging, or actively leaking, trust what you are seeing. Ceilings do not usually get better with time. Fast action protects the structure above, the room below, and the people living in the home.
The post Water Damaged Ceiling Repair Steps first appeared on FloStop Restoration.